 Permissions are required to work in the Setup.
A member is a contact who has been given a Member profile that gives them limited access to their own and other permitted information in your application.
A Member profile is used to grant access to information and functionality to contacts in your application, so they can work with the application as well. Contacts could be members, clients, consultants, vendors, etc. Members limited access to information and functionality. For example, a member could see and update only their own contact or billing information, where a user would be able to see that information for all contacts. It also allows you to provide a different level of service, such as allowing members to see services and features that are not available to a Public profile. For example, a member could book an appointment with a person, but a public user may only be able to register for events.
 Permissions are required to work in the Setup.
You can create more than one Member profile.
A member is a User, and can log into the application.
Member profiles do not use the Everyone permissions. Permissions must be explicitly given for objects, views for each object, modules, and applications.
The All view is not accessible to a Member profile. Views will have to be created and / or assigned for Member profiles.
In the application go to Setup > Company Setup > Security, click on Profiles.
Select the Location from the list. This is the location the profile will belong to. (Single location organizations will not have the Location list.)
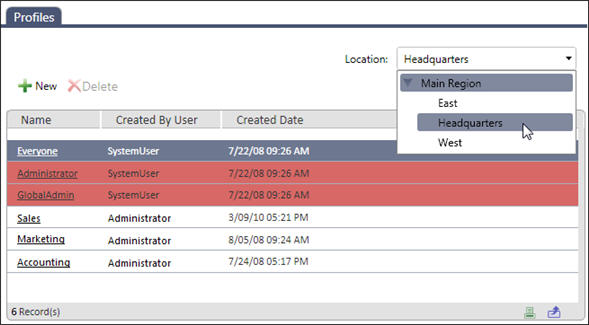
Click New.
Enter a descriptive name for the profile. If this is a multi-location organization, choose whether the profile will apply to the region or organization (See: Regional or Multi-Location Profiles.)
Select the Type Member.
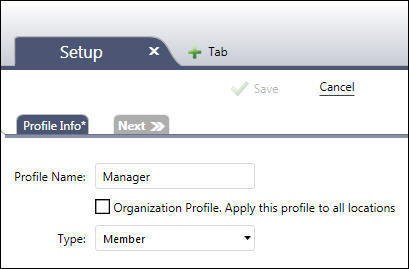
Click the Next tab.
For each object in the Page Layout Assignment, select which page layout the user in the profile will use when they view the information for that object. (You can always use the default layout if you want.)
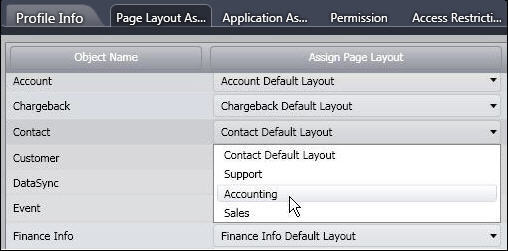
Click the Next tab.
Select which Application Suite(s) the profile will have access to. At least one must be selected. Select an application to be the default. This will be selected for the user when they log in. (An Application Suite is simple a collection of objects the user has access to.)
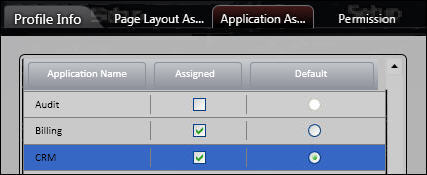
Click the Next tab.
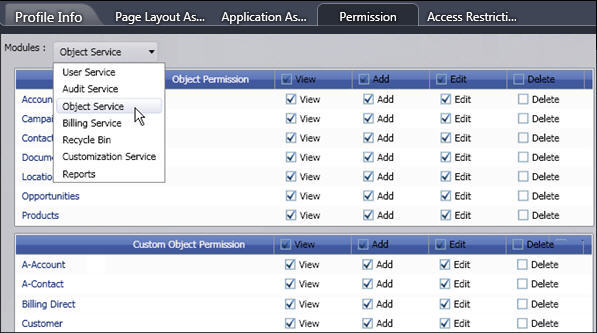
Next, for each section of the application, you need to set Permissions for what the user can do when working in the application. For example, can they see but not change accounts? Can they send email? Can they add new contacts? Can they create new objects?
Select the application or service.
Set the permissions for the object, activity, function, or service.
Note: For each object that has at least View permissions, you will have to assign a view to the member profile for that object. See Views on Objects below for details.
Click the Next tab.
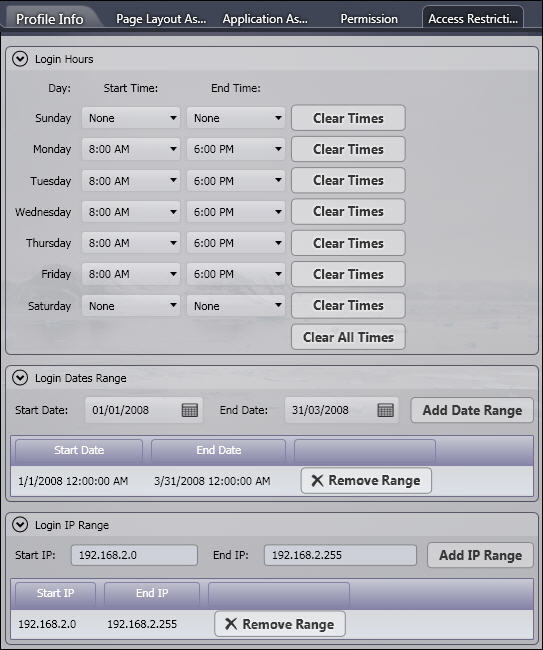
Set the Access Restrictions for the profile. This determines when, for how long, and from where (by IP or internet address) the profile will have access to the application. By default the profile will have access to the application all of the time, from any IP address (any internet connected computer or device). If the Login Hours, Login Dates Range, or Login IP Range are left blank or empty, then there is no restriction on access. When you enter any information, then access is restricted according to what you enter. For example, if you enter the times Monday 7:00 AM to 7:00 PM, but no other days or times, then access is restricted to that one day during those times (and you will probably want to add more days and times). If you left all Login Hours fields set to "None", access would be any day at any time.
Click the Save button to finish, or Cancel to return to the Profiles list without saving any information or changes.
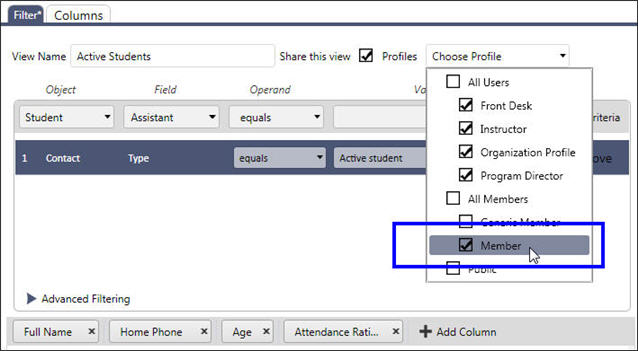
Member profiles do not have any views for objects assigned to them. They do not use the All view available to User profiles. If you do not assign a view a member will not see anything when they log in.
For every object that you gave permissions to in a Member profile, you need to make sure that it has at least one view assigned to the Member profile.
You can do this by editing the Views on an object, either from the object itself, or by going to Setup > Development > Objects and selecting the object, then selecting the Views tab.
When changes are made to a profile, those changes will be applied to all of the users in the profile.
From the application Setup > Company Setup > Security, click on Profiles.
Select the Location from the list (or Region for multi-location organizations).
Click on the name of the profile that you want to edit.
Select your tabs and make any changes.
Click the Save button to finish, or Cancel to return to the Profiles list without saving any information or changes.
|
|