A page layout lets you choose what information to show, where on the
page it appears, and who gets to see it. You can
have more than one page layout for an object.
Permissions
are required to work with custom objects.
A Page Layout allows you to determine how you will show the information
about an object; it controls what the user will see. Each
object can have more than one page layout, and each layout can show your
choice of information in the way that you want to show it. A
page layout can be assigned to different user profiles, so you can choose
exactly what you want to show to the users. You
can create a summary view of the layout by choosing what fields will be
part of the summary view. PerfectMind automatically
creates a default page layout which you can edit and use.
When creating a page layout, first the page is created and named. You
can then add Sections to the page, which are table-like areas on the page
with rows and columns. You can add the Fields to
the sections, and this is the information that the user will see. If
an object is linked to other objects (Parent objects, through a Master-Detail
or Lookup Relationship), you will be able to select fields from the Parent
object, but they will be Read Only and their information can not be changed.
Page Layouts are added to objects. Start from
the Setup in PerfectMind, select Custom Objects, and click on the name
of the object you wish to add a new page layout to.
Click the Page Layout tab.
Click the New
button to create a new layout.
Give the layout a descriptive name in the Page Layout
Name, so you will know what it is for later.
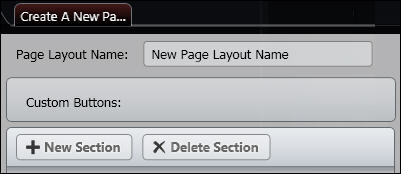
Click Add Button
to add custom buttons to the layout. These appear
at the top of the page layout. Custom buttons can
perform actions that you define. See: Custom Buttons for more
information on creating buttons.
In the Section Properties, give the first section a
Name, and select the number of
Columns (maximum of three columns)
and Rows. You
can change this at any time. The section acts to
group the fields together, and identify their purpose.
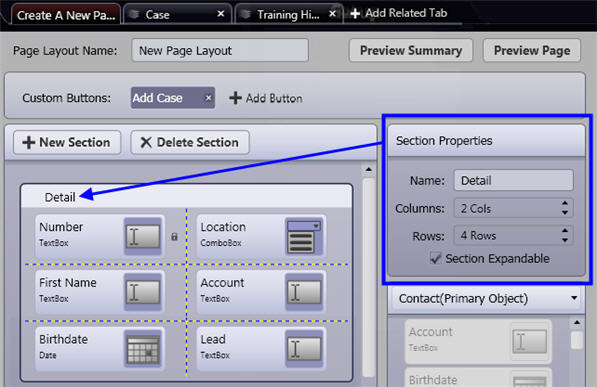
If you want the section to be open and the fields displayed
when the user sees the page, check the Selection
Expandable box. If you un-check the box,
the user will see the section name, and be able to expand it themselves
on the page.
From the list of the fields, click on a field and drag
it and drop it into the place where you want it to appear. You
can clear a field by reversing this, just click on the field in the section
then drag it over to the list.

If you want to add a new section click on the New Section button, and name and format
the new section, and drag the fields onto it.
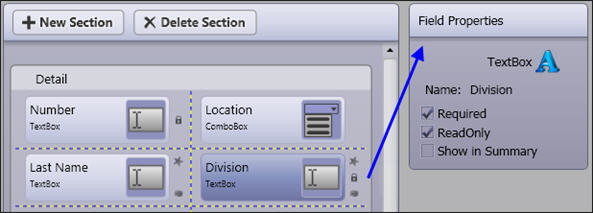
When the field has been added to the section, click
on the field icon to set the fields properties. You
can make a field Required (must
be filled in when creating a new entry), Read
Only (can not be changed), and Show
in Summary (see it in the Summary view of the page layout). Note
that icons for these field properties will appear next to the field on
the page layout.
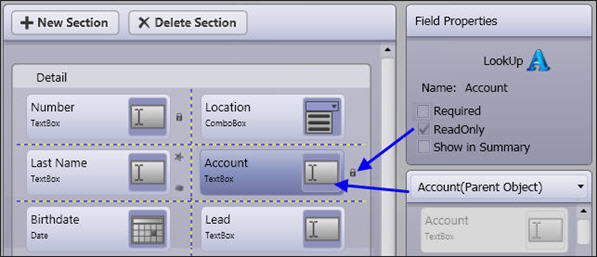
If the object is linked to another object by a Master-Detail
or Lookup Relationship field, the fields from the Master object will be
available for the layout. These fields from other
objects are always Read Only
and can not be changed from Read Only.
You can embed a chart based on a report into the page
layout. When the page layout is viewed, the report
will be part of the page, and show information relevant to the record
being viewed. For example, for a customer sales
report, it would show sales for the customer that was being viewed. Select
Report Charts from the object
drop down list above the list of fields to see the available charts. See
Create a Report for more
information.
You can add Related
Tabs to the layout. See: Page
Layout - Add Related Tabs for details. Related
Tabs provide other information such as:
Audit: This allows you to
see who worked with and made changes to the object, such as adding it,
leaving notes, editing it, etc.
Related Objects: You can
see fields from related Detail
objects from Master-Detail and Lookup Relationships. For
example, for a Customer, you could add the Related Tab for Invoices, so
as to see all of the invoices for a customer on the same page.
You can add a Notes tab that allows users to enter any
information by enabling Notes for the object. See
Notes for details on how to do this.
Click Preview
to see the how the layout will be displayed.
Click Preview Summary
to see the Summary view. You must have at least
one field with it's Show in Summary property checked to have a Summary
view. There can be a maximum of ten fields in the
Summary view.
Click Save to
finish. If you click Cancel you will return to
the Page Layout list view without saving the changes.
To assign a page layout to a profile, see Page
Layout Assignment.
You can change and update views that you have already created and saved.
This allows you to use an existing page layout and make a copy of it
to use as a template for a new page layout.