This section describes how to create a contract and complete the transaction by navigating to the Store. Once the transaction is created, the contract is linked to the transaction.
For information on how to create contract with the Contract page layout version 1 (Old) click here.
For information on cancelling contracts with a transaction see below.
Contracts can be backdated for entering existing agreements.
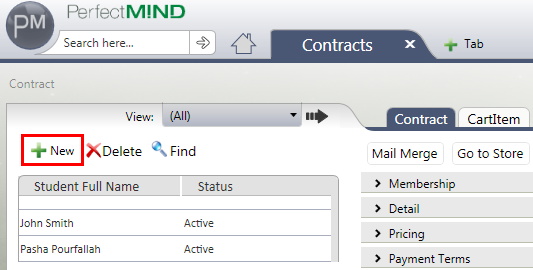
1. From your Contract object page click on the New button.
The Contract can also be accessed from the Student page by opening the student record you want to add a contract to.
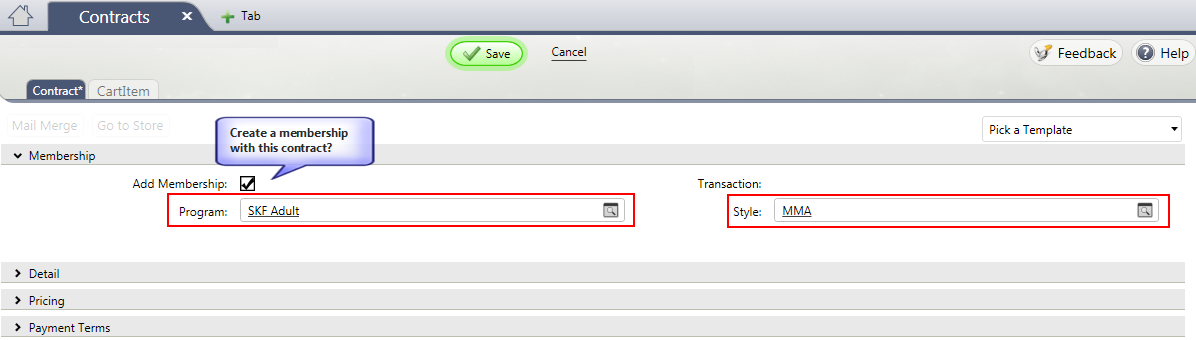
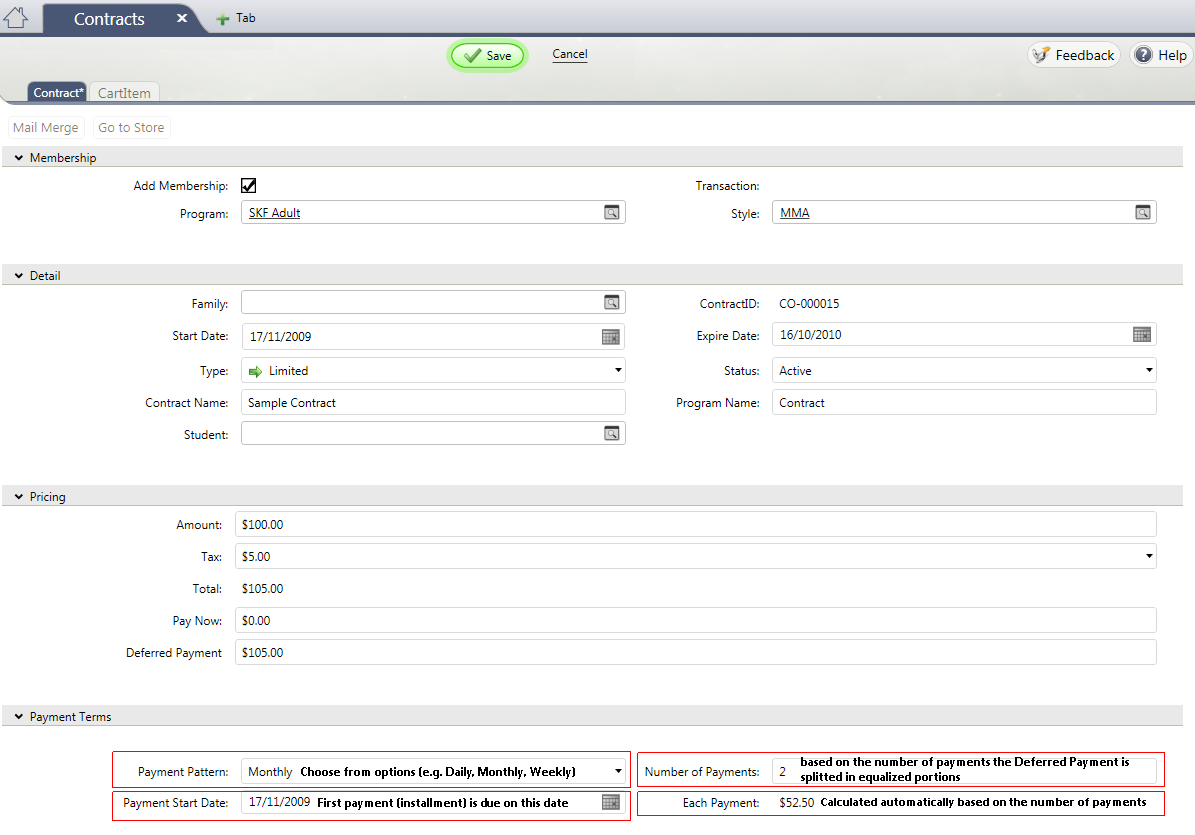
2. If you need to add a membership for the student you can specify the Program & Style on the Membership section; The membership will be created for the student once the contract is saved. Otherwise, uncheck the Add Membership check box and go to the Detail section.
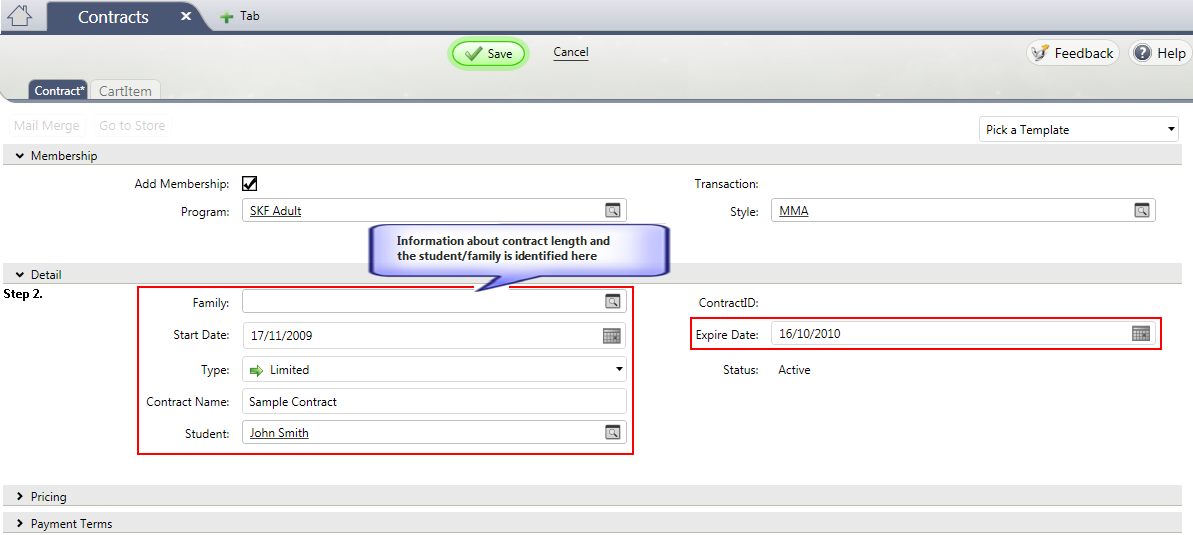
3. The main information about the contract start and expire dates, type, and etc. are entered at this point
4. Pricing information is entered in this section and immediate payment (Pay Now) is determined here, if applicable.
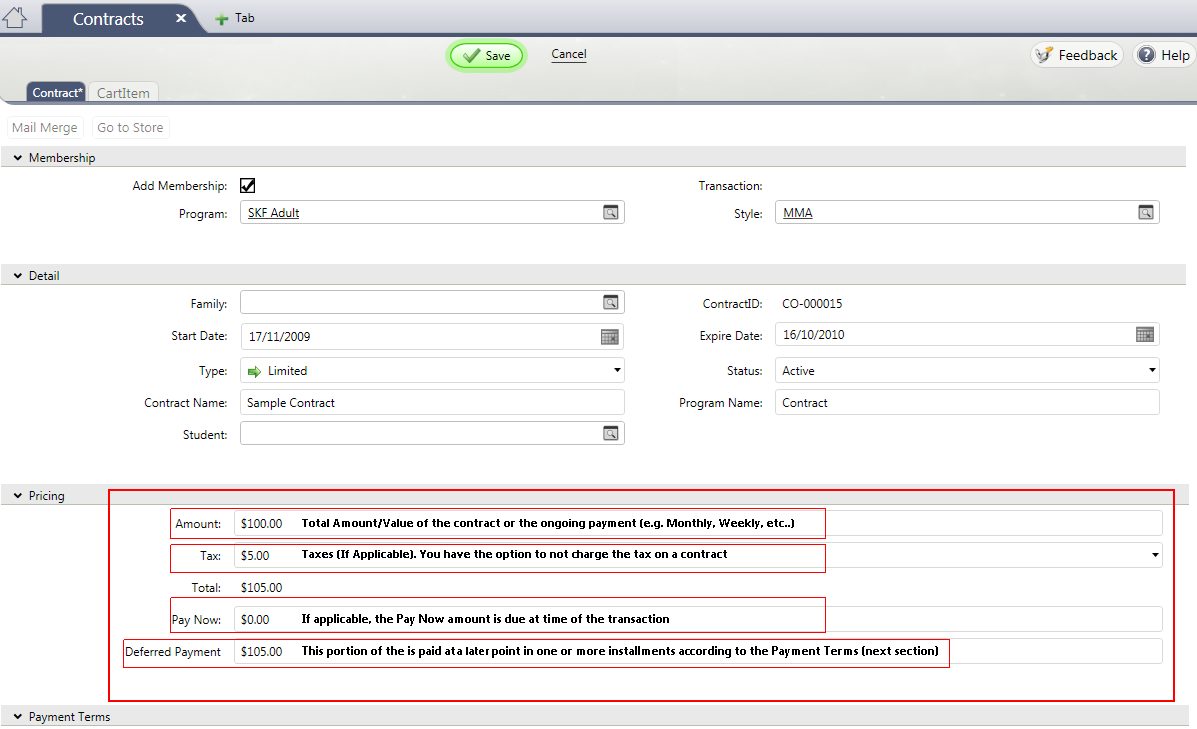
5. The last step is to define contract payment terms and it refers to schedule of payments, first and total number of payments dates (no total number of payments for ongoing contracts).
Now you can save your contract. you can also print a paper version of the contract for the client to sign. To do so, click on the Merge button and pick up your pre-made word document (see Mail Merge for more information).
1. Click on the Go to Store button.
2. Your Store opens in a separate tab. All relevant contract information is transmitted to the Store as a single purchased item including the payment recurrence information.
3. Click on Checkout button on the bottom left of the store.
4. Enter any Pay Now and any Pay Later details. Depending on your recurrence information from the contract, some fields may be restricted to stay within limits of your contract.
5. Complete the Store process when the Complete button appears. Done!
If you go back to your student's contract and manually refresh the contract, then you will now notice the contract has a transaction number. Furthermore, the contract is no longer editable.
If you create a transaction on a contract (whether you are using the Billing Service or not), you must terminate the transaction in order to cancel the contract. The contract status will change automatically when this happens. The status of any memberships based on the contract will not be changed, and may have to be changed or made inactive manually.
If you also check your student's membership tab, you will notice a new Membership was created for you assuming you did check in the contract to add a membership for you.
Opening the Reports object, expanding the Applications folder, then expanding the Martial Arts folder, you will notice pre-made reports. Some of them are based specifically on contracts created from the Store that would otherwise not be possible.